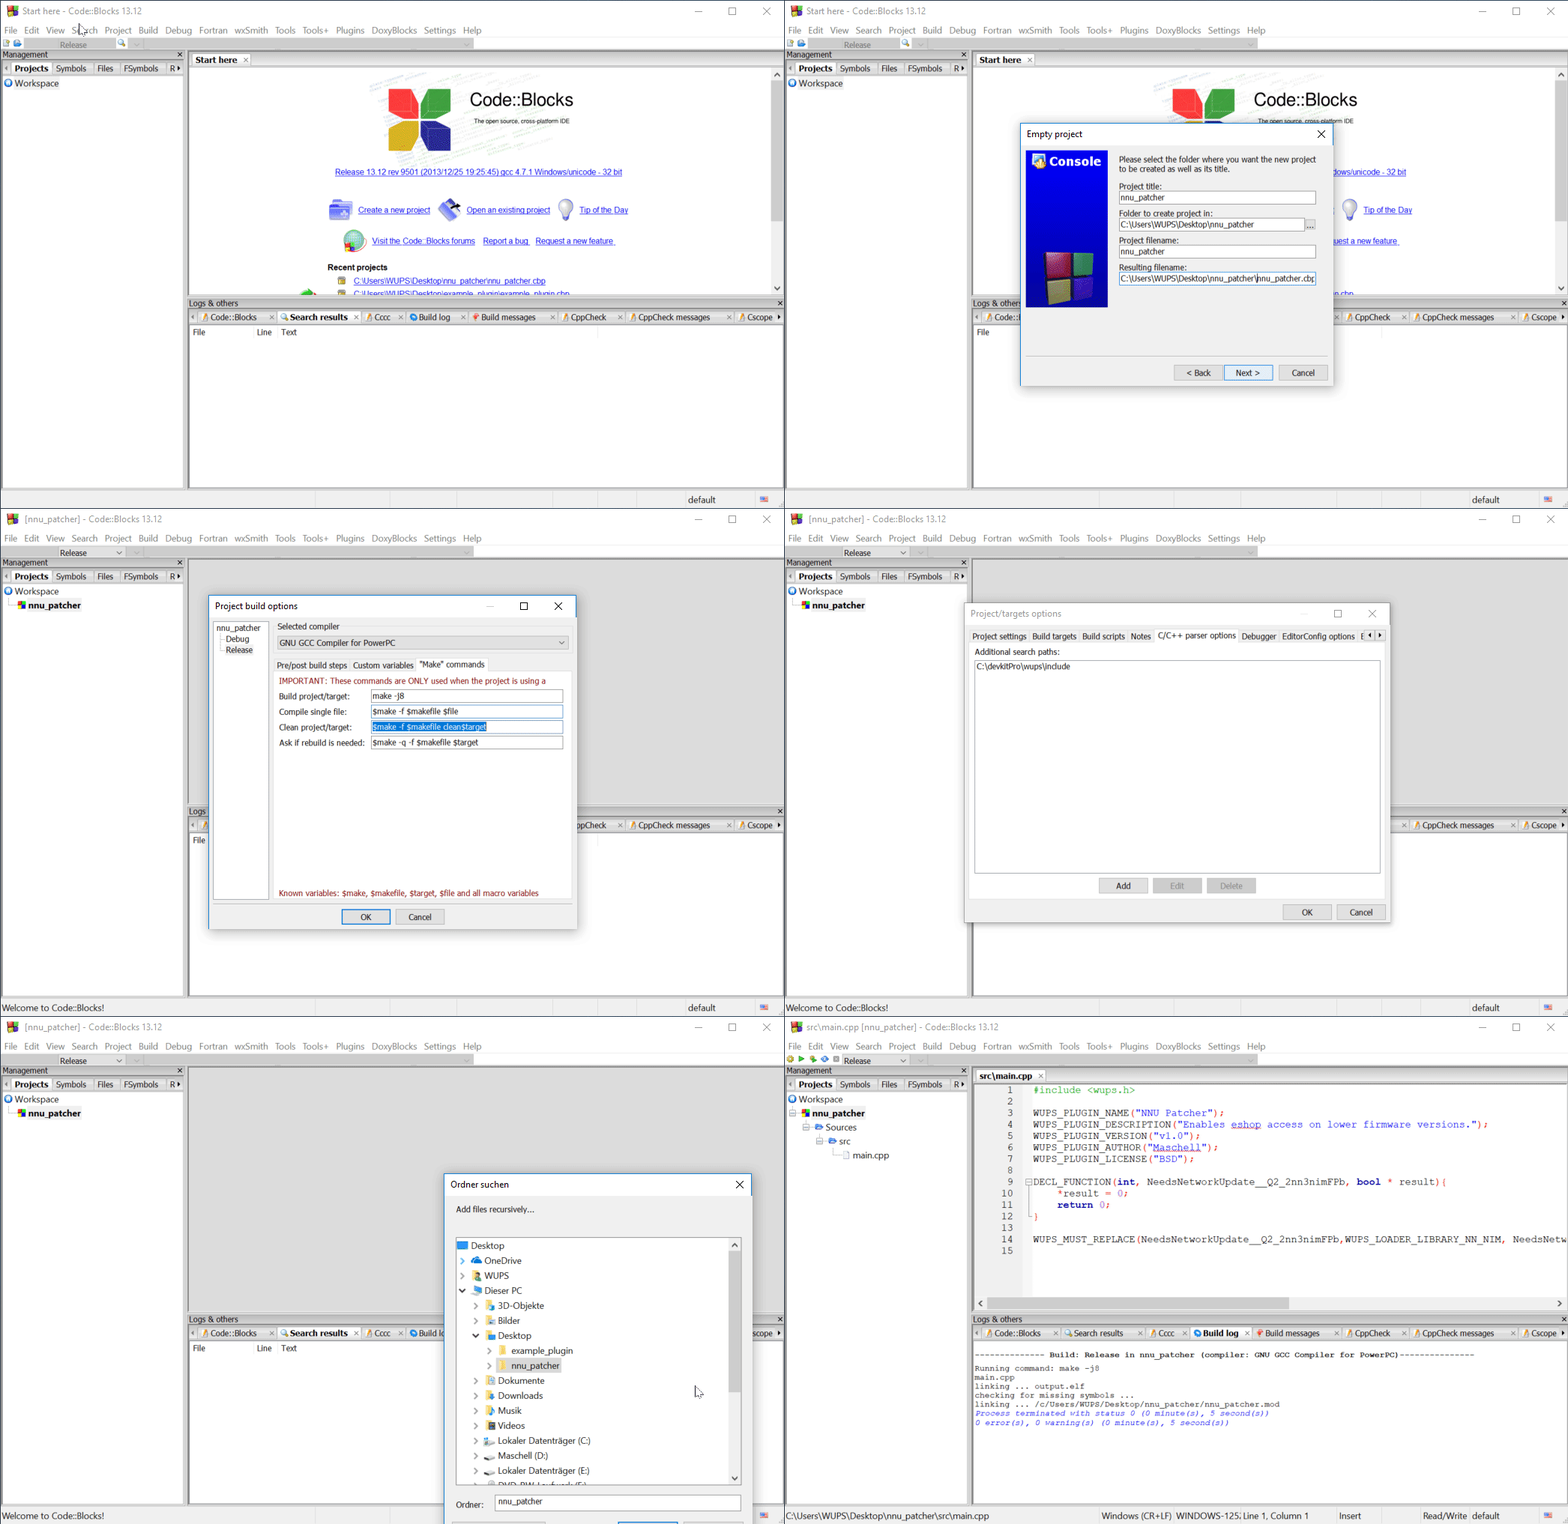
Creating a new project for an existing plugin.
This requires the IDE, toolchain and libraries already to installed and set up.
You may also want to take a look at the Code::Blocks templates, a tutorial can be found here.
Existing source files, can be turned into a Code::Blocks project. This requires an existing Makefile that will be used. One can be found for example in the example_plugin.
Creating the project files
- Click on
File -> New -> Projecton the menu bar. - Choose
Empty projectand pressGo - Click on
Next - Set a project title
- Fill in the path of the (existing) project
- Make sure the
resulting filenameis correct (removing on directory) - Press on
Next - Choose the
GNU GCC Compiler for PowerPC (HighTec) - Press
Finish
Configure the project - setting custom makefile
- Right click on the project and choose
Properties - Tick the checkbox at
This is a custom Makefile, to a custom Makefile. - Save the settings by clicking on
Ok - Right click on the project and choose
Build options - Go to the tab
"Make" commands - Set
Build project/targettomake -j8 - Set
Clean project/targettomake clean - Save the setting by pressing
Ok
Configure the project - adding include paths
To have the best experience with the auto-completion, you need to add the header of all linked static libs.
This can be done with the following steps:
- Right click on the project and choose
Properties - Open the C/C++ parser options` tab
- Add all missing include path using the
Addbutton. - Save the settings by pressing
Ok.
Common include paths would be:
<path-to-installed-devkitpro>\wups\include
<path-to-installed-wut>\include
<path-to-installed-wut>\include\libutils\wut
Adding the source files
To add the source files:
- Right click on the project and choose
Add files recursively... - Choose the project folder (should be default)
- Click on
Ok - Click again on
Ok - Click one last time on
Ok
Now you should see your source files and can modify them. Try to build the project with CTRL + F9
